Using the Windows Binary Distributions
This page provides important information for users of the Ice binary distributions on Windows platforms.
On this page:
Overview of the Ice Binary Distributions for Windows
Ice 3.7 provides the following binary distributions for Windows:
- A traditional Windows installer file, ice-3.7.10.msi
- Several NuGet packages: zeroc.ice.v100, zeroc.ice.v120, zeroc.ice.v140, zeroc.ice.v141, zeroc.ice.v142, zeroc.ice.v143 and zeroc.ice.net
The table below shows which distribution(s) you should install depending on your needs.
| Activity | Compiler or Environment | Distribution to Install | Files Installed |
|---|---|---|---|
| Develop C++ desktop applications | Visual Studio 2010 Visual Studio 2013 Visual Studio 2015 Visual Studio 2017 Visual Studio 2019 Visual Studio 2022 | zeroc.ice.v100 zeroc.ice.v120 zeroc.ice.v140 zeroc.ice.v141 zeroc.ice.v142 zeroc.ice.v143 | The complete Ice C++ SDK for the selected compiler, with x86, x64, Debug and Release binaries All Slice compilers (slice2cpp, slice2cs, slice2java, etc.) All Ice services (Glacier2, IceBridge, IceGrid, IcePatch2, IceStorm), and the associated command-line utility tools (icegridadmin, icestormadmin, etc.) |
| Develop C# or other .NET applications | Visual Studio 2013, 2015, 2017, 2019 or 2022 .NET 6.0 SDK, .NET 7.0 SDK, .NET Framework 4.5.1 | zeroc.ice.net | The complete Ice C# /.NET SDK, including |
| Develop PHP applications | PHP 7.1, 7.2, 7.3, 8.0 | Ice MSI | The IceGrid GUI admin tool All the Slice compilers (slice2java, slice2php, etc.) All the Ice Slice files The Ice for PHP extension All Ice services (Glacier2, IceBridge, IceGrid, IcePatch2, IceStorm), and the associated command-line utility tools (icegridadmin, icestormadmin, etc.) (x64 Release only) |
| Develop Java applications | JDK 8, JDK 11, JDK 17, JDK 21 | Ice MSI | |
| Administer IceGrid deployments | Ice MSI | ||
Deploy Ice services (Glacier2, IceBridge, IceGrid, IcePatch2, IceStorm) | Ice MSI |
If you are developing applications with Visual Studio, you should also install Ice Builder for Visual Studio.
C++ run time
Ice MSI
All the C++ binaries installed by the Ice MSI are x64 Release, built with Visual Studio 2015. The Ice MSI installs the corresponding Visual C++ run time on your computer: you don't need to install Visual Studio or any Visual Studio Redistributable to use this distribution.
Ice NuGet packages
The Ice NuGet packages do not install the Visual C++ run time on your computer.
NuGet Package Installation
Adding a NuGet Package to a Visual Studio Project
Follow these steps to install Ice NuGet packages on your computer.
- Open the Visual Studio Solution that contains the project you want to work on.
- Open the NuGet Package Manager from the Tools menu:
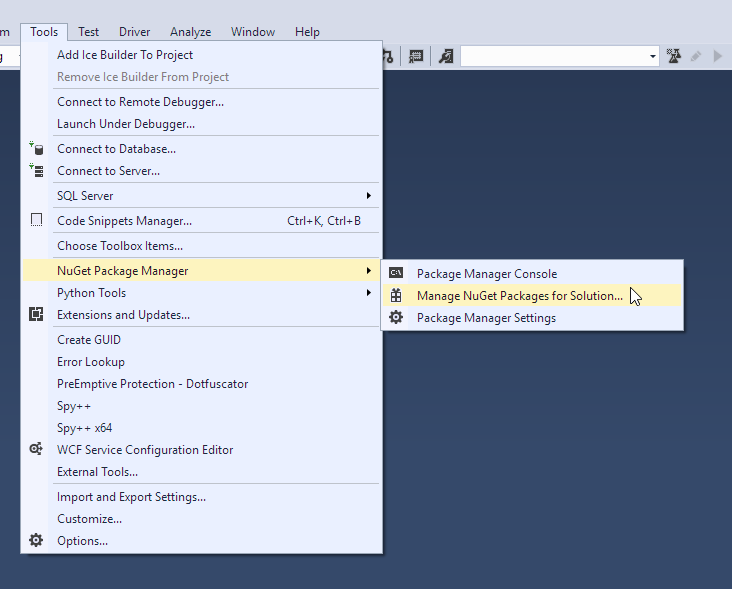
- On the next screen, select the zeroc.ice package you want to install, then select the project in which you want to install it, and finally click the Install button.
NuGet will install this package in thepackagesfolder next to your Solution file and configure the selected project to use it.
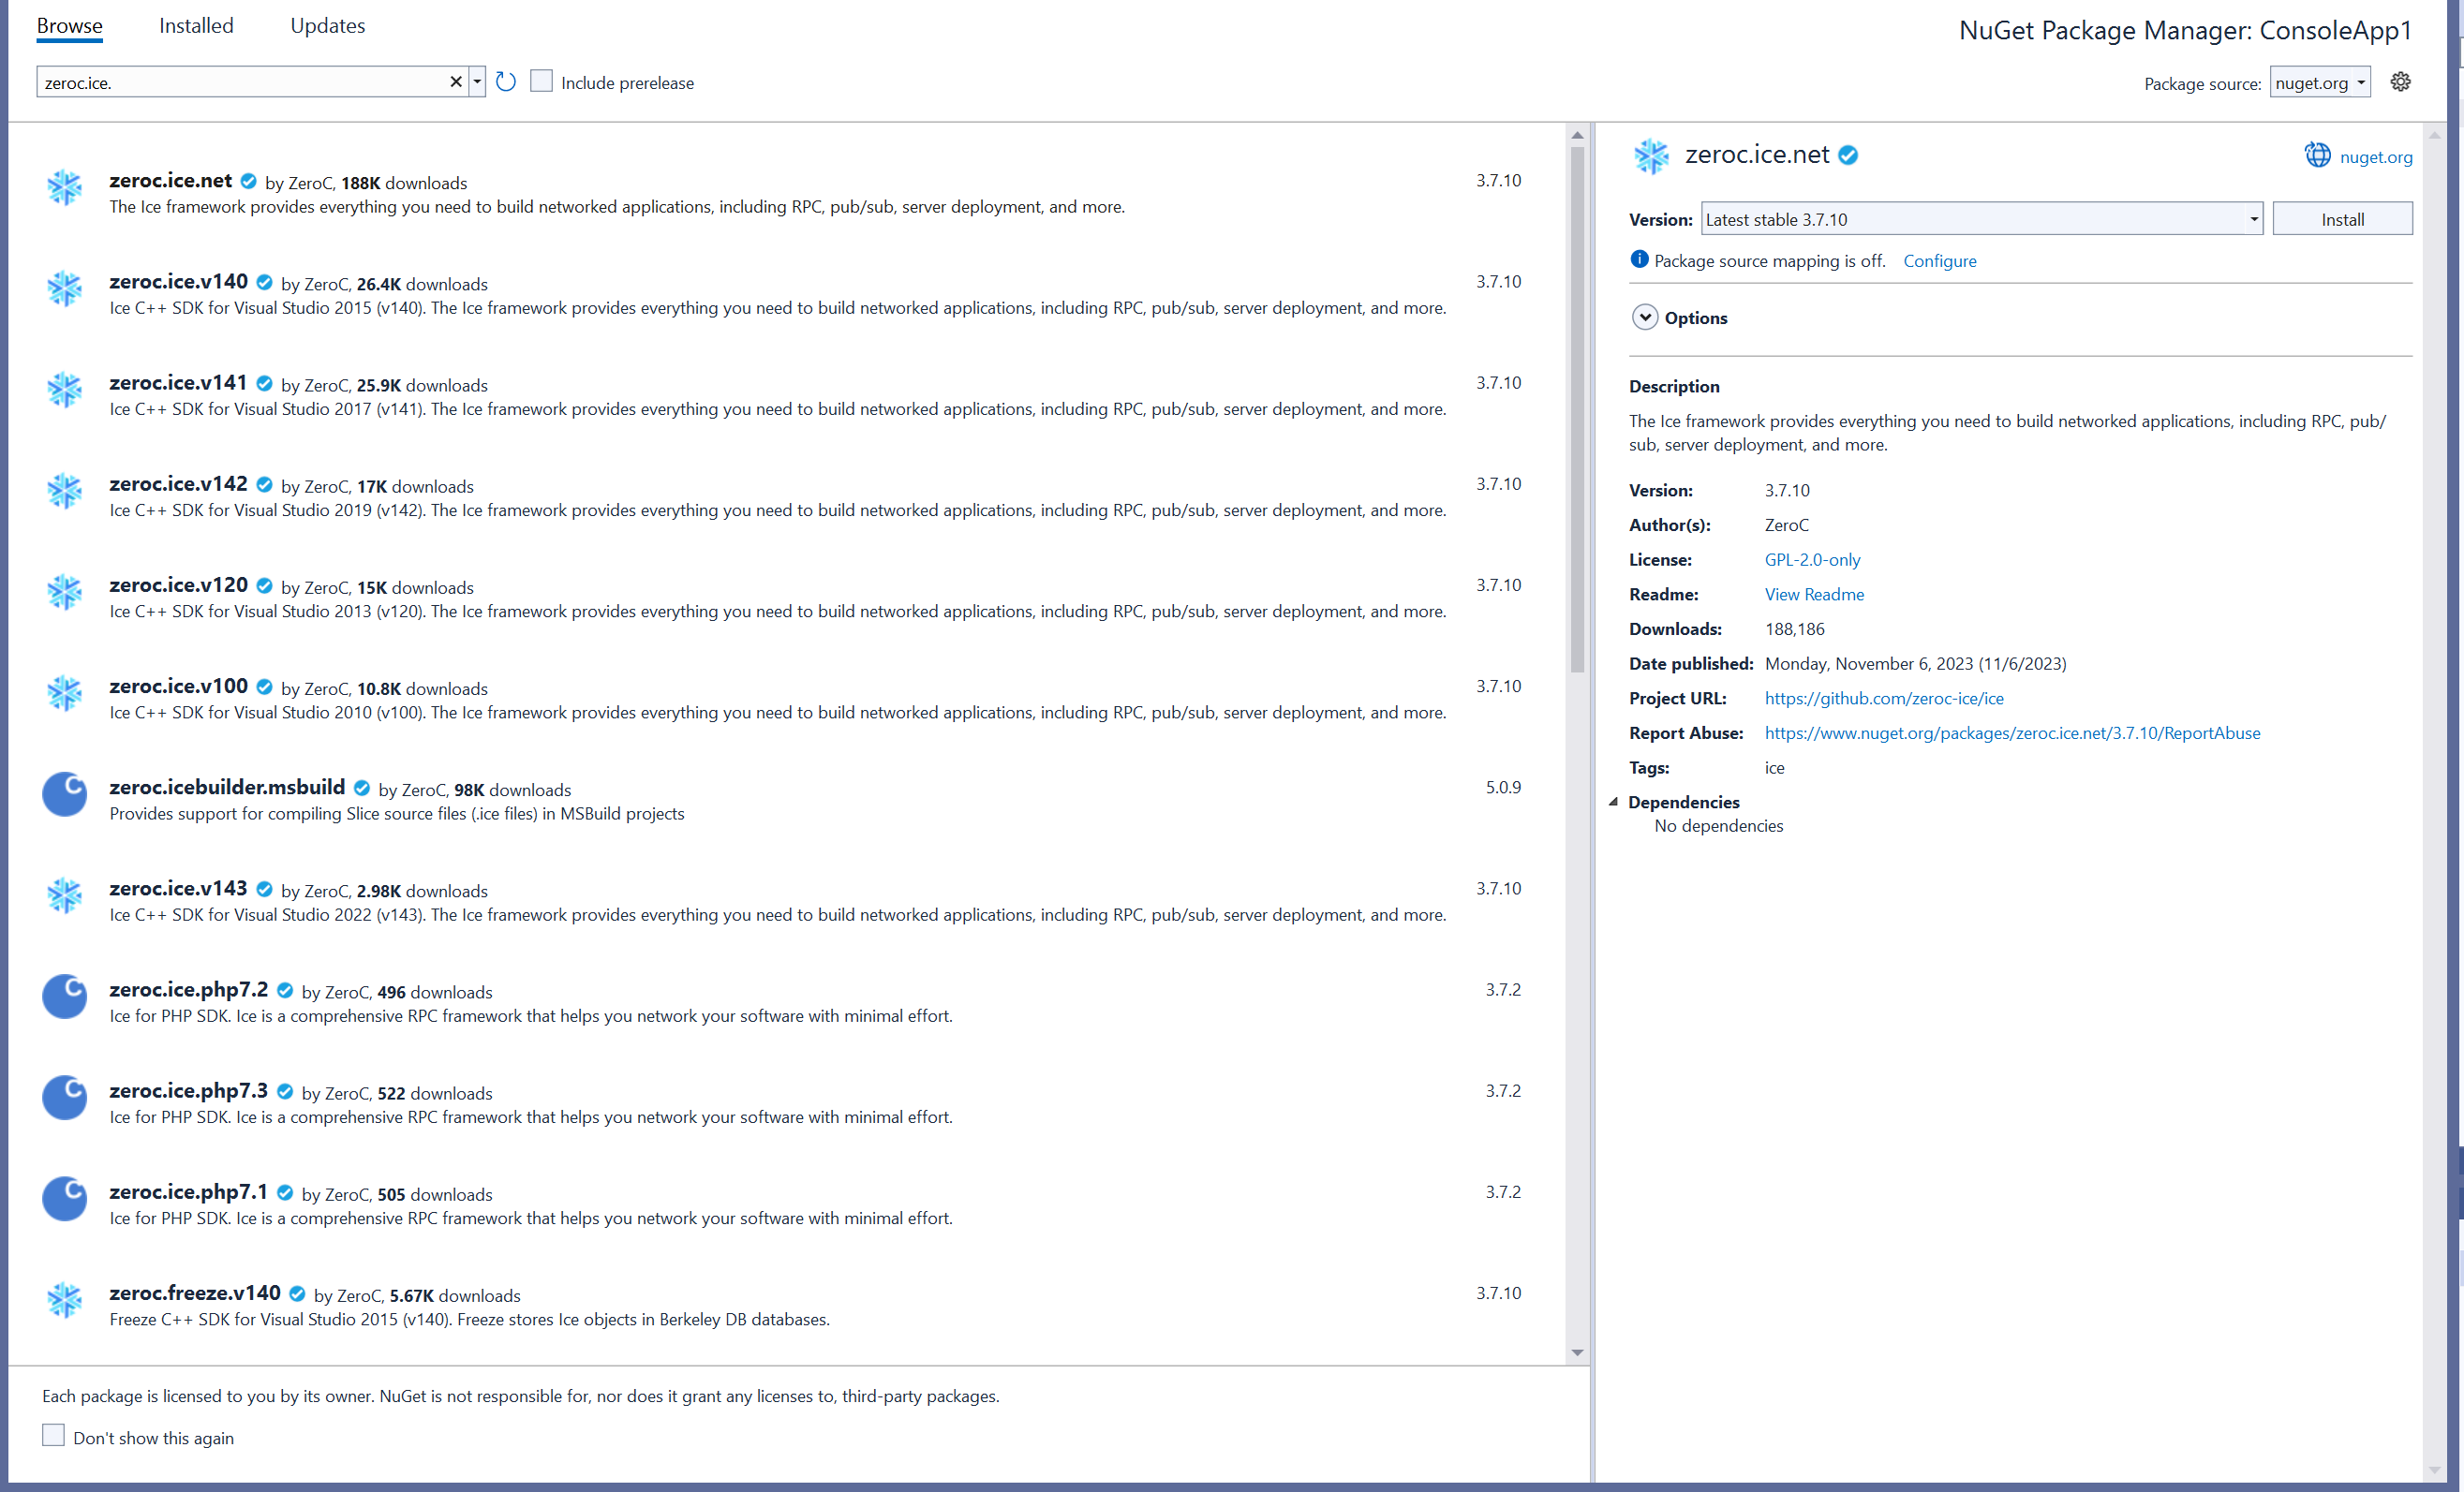
The screenshot above shows a solution with a C# project. The process is the same with C++ projects.
If you are using Ice Builder, you also need to add zeroc.icebuilder.msbuild to your C++ or C# project.
ZeroC Symbol Server
The ZeroC symbol server, https://symbols.zeroc.com, provides debug symbols for the C++ binaries included in the NuGet packages published by ZeroC.
To use this symbol server, add its URL on Visual Studio's Symbols page:
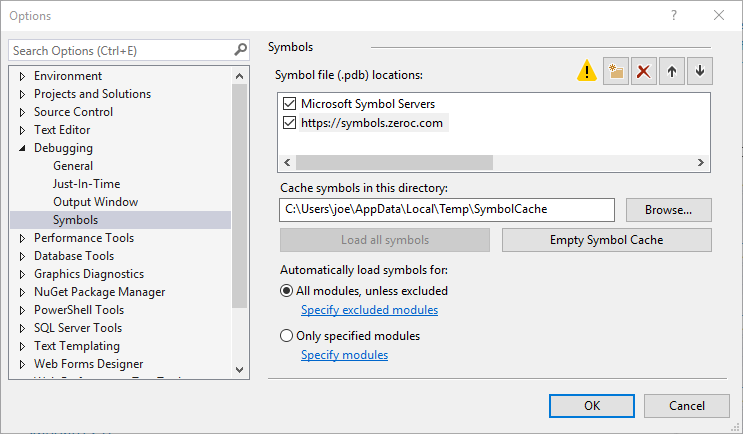
Check "Enable source server support" in Visual Studio's debugging options to allow Visual Studio to fetch the corresponding source code.
Debug Symbols and Stack Traces for C++ Applications
Ice C++ applications can print stack traces for Ice exceptions, which can be very helpful for debugging. In order to get usable stack traces, you need to install the corresponding Ice debug symbols in a local folder, and configure your system to look for debug symbols in this folder. We recommend you do the following:
- Download and install the Debugging Tools for Windows.
Add these tools to your PATH, for example:
set PATH=C:\Program Files (x86)\Windows Kits\10\Debuggers\x64;%PATH%
Download the debug symbols of your Ice NuGet package(s) to your local
SymbolCachefolder, with thesymchktool included in the Debugging Tools for Windows. For example:symchk /v /r packages\zeroc.ice.v140.3.7.10\build\native\bin\* /s SRV*%TEMP%\SymbolCache*https://symbols.zeroc.com
(remove the
/voption for a quieter output)
This copies debug symbols for all the binaries in the selected NuGet packages to%TEMP%\SymbolCache.%TEMP%\SymbolCacheis also the default symbol cache folder for Visual Studio. This folder can cache symbols for any number of NuGet packages, in particular the debug symbols of different versions of the same package.Set the environment variable _NT_SYMBOL_PATH to point to this local
SymbolCachefolder, for example:set _NT_SYMBOL_PATH=%TEMP%\SymbolCache
Using the NuGet Packages
Information for C++ Developers
Once you've installed the Ice NuGet package into a C++ project as shown earlier, this project will find automatically all Ice C++ header files and import libraries. If you add zeroc.icebuilder.msbuild to this C++ project, Ice Builder will take care of compiling the Slice files in this project with slice2cpp (it uses the slice2cpp installed from the NuGet package).
Moreover, the Debugger Path is set and you can run your application directly from Visual Studio - there is no need to set any additional environment variables.
Occasionally, you may want to run your application outside Visual Studio, or use one of the Ice services or Ice tools included installed by the NuGet package. To do so, add the NuGet package's bin folder to your PATH.
The zeroc.ice.<version> package is installed in the packages folder next to your Visual Studio solution file. For example, a Visual Studio 2017 solution would have a structure similar to the following:
C:\MyApplication\MyApplication.sln
C:\MyApplication\MyApplication\MyApplication.vcxproj
C:\MyApplication\packages\zeroc.ice.v141.3.7.10
With this example, you could set your PATH to:
set PATH=C:\MyApplication\packages\zeroc.ice.v141.3.7.10\build\native\bin\x64\Release;%PATH%
Compiler Settings
Your application must be compiled with the same flags as the Ice libraries:
- Release:
/MD /EHsc - Debug:
/MDd /EHsc
Add ICE_CPP11_MAPPING to the project preprocessor definitions if you want to use the Ice C++11 mapping. Without this definition, you will use the Ice C++98 mapping.
With Ice Builder for Visual Studio, the preferred way to select the C++ mapping is through an Ice Builder property.
You don't need to list Ice import libraries such as iceD.lib when linking with Ice libraries. See Linking with C++ Libraries on Windows for additional details.
NuGet Package Details
The following table shows the Ice C++ NuGet package layout:
| Folder | Description |
|---|---|
build\native\include | C++ header files |
build\native\lib\<Platform>\<Configuration> | C++ import libraries |
build\native\bin\<Platform>\<Configuration> | C++ binaries (excluding Slice compilers) |
tools | slice2xxx compilers |
build\native | Visual Studio property and target files |
slice | Slice files |
Installing the NuGet package imports the property and target files from the build\native folder into the project. The property file defines properties used by Ice Builder; you can also use them in custom build steps.
The table below presents these properties:
| Name | Value | Description |
|---|---|---|
IceVersion | 3.7.10 | Ice string version |
IceIntVersion | 30710 | Ice version as a numeric value |
IceVersionMM | 3.7 | Major Minor version |
IceSoVersion | 37 | Version used in dynamic libraries |
IceNugetPackageVersion | 3.7.10 | NuGet package version |
IceHome | $(MSBuildThisFileDirectory)..\.. | Full path to the package root folder |
IceToolsPath | $(IceHome)\tools | Full path to the folder of the Slice compilers |
The .targets file configures the C++ Additional Include Directories and Additional Library Directories to locate C++ headers and import libraries in the package's include and lib folders.
The NuGet package automatically adds its build\native\lib\<Platform>\<Configuration> folder to the Additional Library Directories, where <Platform> is the selected platform and <Configuration> is Debug when the MSBuild property UseDebugLibraries is true. Otherwise, <Configuration> is Release. Projects created with recent versions of Visual Studio set UseDebugLibraries to true automatically for debug projects (meaning projects that link with the Visual C++ debug run-time libraries); if you created your project with an older version of Visual Studio, you need to edit the project file and set UseDebugLibraries to true for your debug configurations, for example:
<PropertyGroup Condition="'$(Configuration)|$(Platform)'=='Debug|x64'" Label="Configuration">
   ...
   <UseDebugLibraries>true</UseDebugLibraries>
</PropertyGroup>
Information for C# and .NET Developers
Please refer to Building Ice Applications for .NET.
Using the Ice MSI Installation
Information for PHP Developers
The MSI distribution includes all the components required to develop Ice for PHP applications on Windows, including PHP and Slice source files, the slice2php compiler and the Ice for PHP extension. The MSI installer detects the PHP installations on your computer and install the Ice for PHP extension for the supported PHP versons:
For each PHP version, the installer copies the Ice for PHP extension to the extensions folder and updates the php.ini configuration file to load the extension; it also modifies include_path to include the Ice for PHP folder. The following lines are added to php.ini:
[PHP_ZEROC_ICE]
extension=php_ice_nts.dll
include_path=${include_path}";C:\Program Files\ZeroC\Ice-3.7.10\php"
The Ice MSI includes both x86 and x64 versions of the Ice for PHP extension built with the PHP 7.1, PHP 7.2, PHP 7.3, and PHP 8.0 NTS libraries.
Configuration Files for IceGrid and Glacier2 Services
The config subdirectory of the Ice MSI installation includes sample configuration files for the Glacier2 router, IceGrid node, and IceGrid registry. These files provide a good starting point on which to base your own configurations, and they contain comments that describe the settings in detail.
The Ice manual provides more information on installing and running the IceGrid registry, IceGrid node, and Glacier2 router as Windows services.
Starting IceGrid GUI on Windows
You can launch IceGrid GUI using the shortcut that the Ice MSI installer created in your Start menu as IceGrid GUI. IceGrid GUI is a Java-based application.
Unattended Installation
The Ice MSI installer supports unattended installation. For example, in an administrative command window you can run:
start /wait Ice-3.7.10.msi /qn /l*v install.log
Windows may prompt you to confirm the installation, otherwise the installer runs using its default configuration (i.e., default installation folder, adds the installation's bin folder to the system PATH, and installs the PHP extension for the PHP installations it detects) but without any user interface. The installer will create a log of its activities in the file install.log.
Registry Key
The Ice MSI installer adds information to the Windows registry to indicate where it was installed. Developers can use this information to locate the Ice files in their applications.
The registration key used by this installer is:
HKEY_LOCAL_MACHINE\SOFTWARE\ZeroC\Ice 3.7.10
The install location is stored as a string value named InstallDir.
Using the Sample Programs on Windows
The Ice sample programs are provided in ice-demos GitHub repository. You can browse this repository to see build and usage instructions for all supported programming languages.
Clone the ice-demos repository as follows:
git clone -b 3.7 https://github.com/zeroc-ice/ice-demos.git
cd ice-demos